
This guest article is a detailed guide to the Dropbear SSH service, intended for technical readers. It is meant to be one of the first in the VDOO Library, a collection of in-depth technical articles and guides which would provide practical advice to device makers, administrators and users.
Our guest writer, Donald A. Tevault, is a Linux security expert, instructor and consultant, and the author of the book “Mastering Linux Security and Hardening”.
Dropbear is an implementation of the Secure Shell (SSH) remote access protocol, designed as an alternative to OpenSSH for embedded systems. It is commonly found in routers and other devices on the Internet of Things, where it is used to allow remote login for management and troubleshooting. As such, configuring and installing Dropbear securely can be an important building block in the overall security of an IoT deployment.
Introduction
Dropbear is a lightweight implementation of the Secure Shell suite that’s ideal for use on embedded systems or IoT devices that have limited resources. For x86 and x86_64 machines, it’s available in the EPEL repository for all RHEL-type distros, but it’s generally always at least one version behind. For anything that uses an ARM CPU, such as the Raspberry Pi, there’s no EPEL repository. So on ARM-based devices, you’ll have no choice but to install Dropbear from source code. Also, if you install Dropbear from the repository onto an x86/x86_64 machine, you won’t be able to deactivate any weak algorithms that are activated by default. (With the version of Dropbear that’s in the Linux repositories, there’s no configuration option to disable the weak algorithms.)
For this demo, we’ll use a pair of CentOS 7 virtual machines running under VirtualBox, both of which we’ll create with the “Minimal Install” option. SELinux will be enabled and in “Enforcing” mode for both virtual machines. The procedure for doing this on an ARM device, such as a Raspberry Pi, is mostly the same. At the end of the document, I’ll outline the differences.
Outstanding CVEs
At the time of this writing, the current version of Dropbear is 2018.76, which was released on 27 February 2018. Currently, there are no outstanding CVEs for this version.
Security-related Configuration Issues
An OpenVAS scan of Dropbear compiled with its default options shows that several weak encryption algorithms are enabled by default.
| Vulnerability | Description | Solution | Severity |
| hmac-sha1-96 | Weak client-to-server MAC algorithm. | Disable algorithm. | Low |
| hmac-sha1-96 | Weak server-to-client MAC algorithm. | Disable algorithm. | Low |
| 3des-cbc
aes128-cbc abs256-cbc |
Weak client-to-server encryption algorithms. CBC mode can allow an attacker to obtain plaintext from a block of cyphertext. | Disable CBC mode. | Medium |
| 3des-cbc
aes128-cbc abs256-cbc |
Weak server-to-client encryption algorithms. CBC mode can allow an attacker to obtain plaintext from a block of cyphertext. | Disable CBC mode. | Medium |
Initial Setup
Create two CentOS 7 virtual machines, using the “Minimal Install” option. One machine will be for compiling the Dropbear software, and the other machine will be the simulated production machine. (The reason for this, is that you don’t want software compilers installed on your production devices. That would make it too easy for the bad guys to compile malware on the device.)
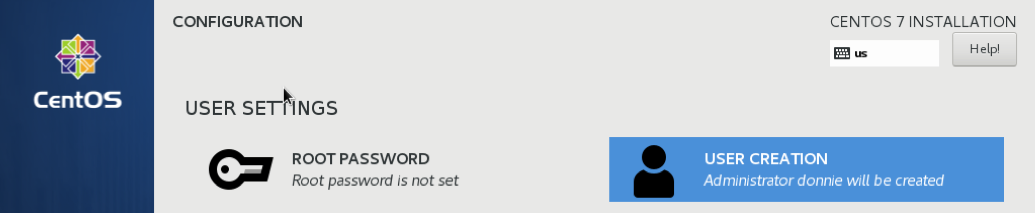
For both machines, create a normal user account, and make that user an administrator.
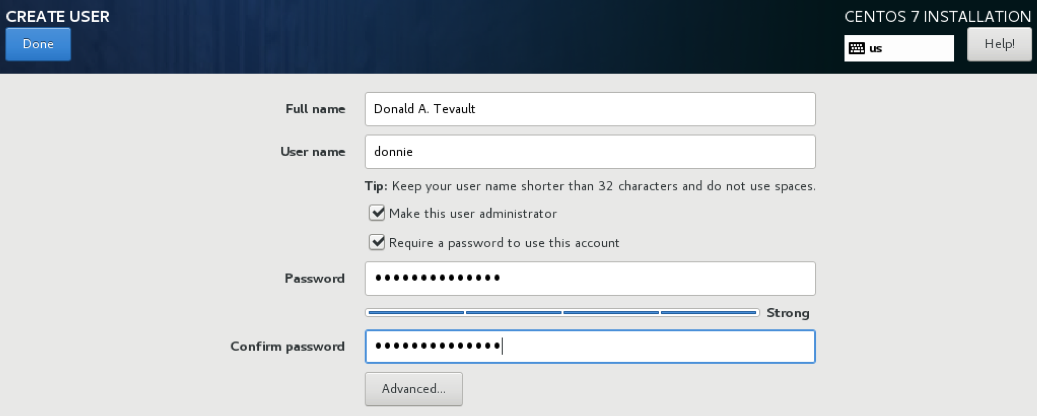
Do not assign a password to the root user, because you want to keep that account disabled.
When the installation process has completed and the machine has rebooted, perform a system update and then shut down the machine:
sudo yum upgrade
sudo shutdown now
In the VirtualBox settings for the virtual machine, configure the network adapter for “Bridged” mode, and set “Promiscuous Mode” to “Allow all”.
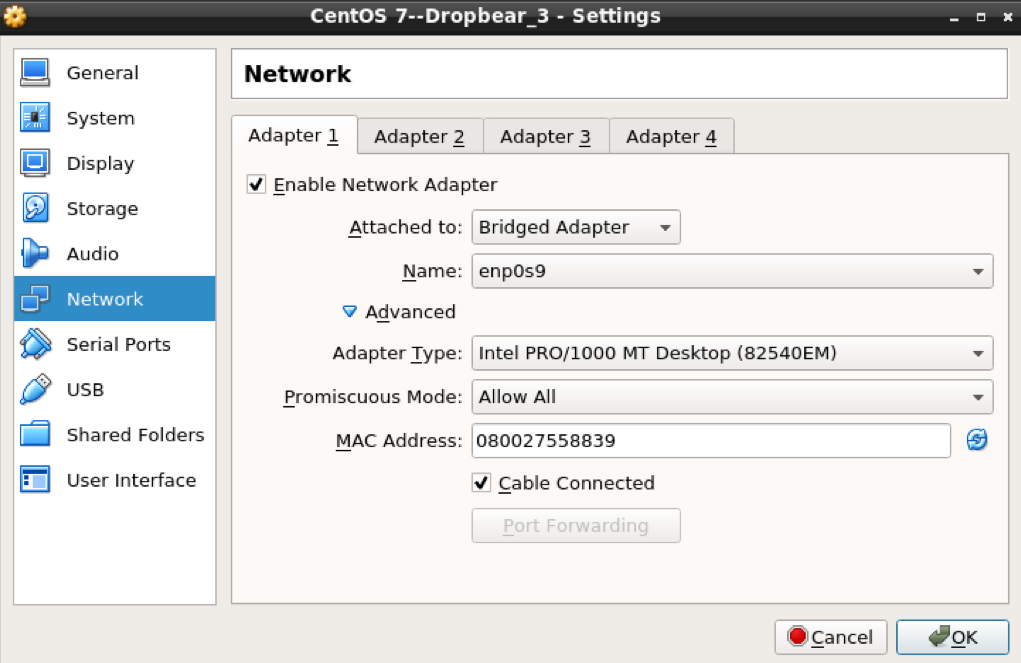
Restart the virtual machine.
On the machine that you’ll use as the software compiler, install the required development tools with the following two commands:
sudo yum install wget bzip2 zlib-devel vim-enhanced make
sudo yum groupinstall “Development Tools”
Next, download the Dropbear source code file to your home directory and extract it. Create a “dropbear” directory within the “/etc” directory:
wget https://matt.ucc.asn.au/dropbear/releases/dropbear-2018.76.tar.bz2
tar xjvf dropbear-2018.76.tar.bz2
sudo mkdir /etc/dropbear
(The “/etc/dropbear” directory will contain the server key files. For some reason, the “make install” command that we’ll do later doesn’t create that directory automatically, and Dropbear won’t run without it.)
Choose Secure Configuration Options
In choosing the configuration options, we’ll assume that you want the highest possible security, and that you don’t need for your devices to interact with older devices that might use older and weaker algorithms.
Enter the “dropbear” source code directory, and create the “localoptions.h” file with your text editor.
cd dropbear-2018.76
vim localoptions.h
Insert the following lines into the “localoptions.h” file, and save it.
#define DROPBEAR_X11FWD 0
#define DROPBEAR_SHA1_96_HMAC 0
#define DROPBEAR_DH_GROUP1 0
The first line is optional, assuming that you won’t need to run any Graphical User Interface programs via Secure Shell. If you do need to run GUI-type programs, you can leave this line out. The second line disables the weak HMAC algorithm. The third line disables “GROUP1” encryption algorithms, which the “defaultoptions.h” file describes as “too small for security”.
Another option is to add a line that will disable CBC mode.
#define DROPBEAR_ENABLE_CBC_MODE 0
Adding this line is supposed to help prevent the dreaded “padding oracle attack” that could cause plaintext data to leak from an encrypted connection. The reason I say this is optional, is that according to Wikipedia, the padding oracle attack is no longer a real threat, although it’s still theoretically possible. If you don’t have older SSH clients that require CBC mode, you can go ahead and disable it with this line.
There are several other things that you can configure in this manner, but since they can also be configured at runtime, we’ll leave those out. That way, you’ll have a bit more flexibility in how you use Dropbear.
Compile and Install Dropbear
Now that you have the desired security configuration, compile and install Dropbear with the following commands:
./configure
make PROGRAMS="dropbear dbclient dropbearkey dropbearconvert scp"
sudo make install
The program executable files will get installed in either the “/usr/local/bin” or the “/usr/local/sbin” directories. Due to a quirk with CentOS, we’ll need to create symbolic links for the executable files in the “/usr/bin” and “/usr/sbin” directories. (Even though the “/usr/local” directories are in the default path setting, for some reason CentOS still won’t find them.)
sudo ln -s /usr/local/sbin/dropbear /usr/sbin/dropbear
sudo ln -s /usr/local/bin/dropbearconvert /usr/bin/dropbearconvert
sudo ln -s /usr/local/bin/dbclient /usr/bin/dbclient
sudo ln -s /usr/local/bin/dropbearkey /usr/bin/dropbearkey
Start and Test Dropbear
Stop and disable the normal SSH service on the virtual machine.
sudo systemctl disable sshd --now
Start Dropbear with the “-R” option.
sudo dropbear -R
Dropbear is now running as a service, and the “-R” option will cause it to automatically create a new server key when a client logs in. Verify that Dropbear is running by entering:
ps aux | grep ‘dropbear’
Go to another client and log into the virtual machine. (The other client could be the normal terminal on your Linux or Mac, or it could be either Cygwin or the new built-in bash shell on a Windows machine.) The command would be in the form of:
ssh donnie@192.168.0.52
Of course, you would need to substitute your own username and IP address.
Look in the “/etc/dropbear” directory to verify that a server key was created.
ls -l /etc/dropbear
Transfer the Executable File to the Production Machine
For our simulation, let’s say that we only need to log into the production device, and that we’ll never need to use the device as a client. So, we’ll only need to copy the “dropbear” executable file to the production device.
In real life, your production device might not already have another SSH suite installed, so you might need to copy the “dropbear” file over via either an SD card or a USB device. Both the x86/x86_64 and the ARM versions of CentOS 7 have the OpenSSH suite, enabled and running by default. So, whether you’re dealing with virtual machines or with real devices, with CentOS 7 you can take advantage of the OpenSSH suite to perform the file transfer. On the first virtual machine, cd into the “/usr/local/sbin” directory, and use scp to transfer the “dropbear” file over to the second virtual machine.
cd /usr/local/sbin
scp dropbear donnie@192.168.0.53:
cd /usr/local/bin
scp dropbearkey donnie@192.168.0.53:
Go to the local console of the second virtual machine, transfer the file over to the correct directory, and then create the symbolic link. Also, create the “dropbear” directory for your server keys.
sudo cp dropbear /usr/local/sbin
sudo cp dropbearkey /usr/local/bin
sudo ln -s /usr/local/sbin/dropbear /usr/sbin/dropbear
sudo ln -s /usrlocal/bin/dropbearkey /usrbin/dropbearkey
sudo mkdir /etc/dropbear
Disable and stop the OpenSSH service. Start the Dropbear service with only the “-R” option.
sudo systemctl disable sshd --now
sudo dropbear -R
Test the setup by going to another machine, which can be either a Linux, Mac, or Windows host, and logging in from its SSH client in the normal manner.
Set Up Key Exchange
On the host that you used to log into the second virtual machine via SSH, log out of the SSH session. If you haven’t already created a pair of keys for that machine, do so by entering:
ssh-keygen
Accept the default options for the name and location of the keys, and create a passphrase. Transfer the public key to the second virtual machine with the following three commands:
exec /usr/bin/ssh-agent $SHELL
ssh-add
ssh-copy-id donnie@192.168.0.53
Test this by logging into the second virtual machine:
ssh donnie@192.168.0.53
You should see that you won’t have to enter your password, since the private key is in the session keyring of your client machine. Now, log out of the SSH session, and go to the local console of the second virtual machine.
Stop the Dropbear service by looking for its PID number, and killing it with “kill”.
[donnie@localhost ~]$ ps aux | grep dropbear
root     18528  0.0  0.0  15116   476 ?        Ss   19:33   0:00 dropbear -R
donnie   20025  0.0  0.0 112660   948 pts/0    R+   20:03   0:00 grep --color=auto dropbear
[donnie@localhost ~]$
In this case, the “dropbear” process has a PID of “18528”. Use that PID number with the “kill” command.
sudo kill 18528
Start the Dropbear service again, but use the “-s” option to disable password logins, and the “-w” option to prevent the root user from logging in. (Even though you didn’t create a password for the root user, you can still use the “-w” option for double protection.) Your command would look like this:
sudo dropbear -R -s -w
Test the setup by logging in from the client from which you transferred your public key. Then, attempt to log in from another client from which you haven’t transferred a public key. This time, your login should be denied.
Your secure setup of Dropbear is now complete. An OpenVAS scan will now show no problems with weak algorithms.
Start Dropbear Automatically
The final step is to set up a pair of systemd service files that will start Dropbear whenever you reboot the machine. First, kill the running Dropbear session as you did previously. In the “/etc/systemd/system” directory, create the “dropbear.service” file with the following contents:
[Unit]
Description=Dropbear SSH Server Daemon
Documentation=man:dropbear(8)
Wants=dropbear-keygen.service
After=network.target

[Service]
EnvironmentFile=-/etc/sysconfig/dropbear
ExecStart=/usr/sbin/dropbear -E -F $OPTIONS

[Install]
WantedBy=multi-user.target
In the same directory, create the “dropbear-keygen.service” file with the following contents:
[Unit]
Description=Dropbear SSH Key Generator
Documentation=man:dropbearkey(8)
Before=dropbear.service
ConditionPathExists=!/etc/dropbear/dropbear_rsa_host_key
ConditionPathExists=!/etc/dropbear/dropbear_dss_host_key

[Service]
Type=oneshot
ExecStart=/usr/bin/dropbearkey -t rsa -f /etc/dropbear/dropbear_rsa_host_key
ExecStart=/usr/bin/dropbearkey -t dss -f /etc/dropbear/dropbear_dss_host_key
RemainAfterExit=yes
You’ve already disabled OpenSSH, and you’ve already created the “/etc/dropbear” directory for the server keys. All you have to do now is to enable and start the Dropbear service, like so:
sudo systemctl enable dropbear --now
Configuring the Dropbear Service
To set your desired runtime options, create the “dropbear” file in the “/etc/sysconfig” directory. The file will contain only a single “OPTIONS=” line, with the desired options. For example, if you want to disable root user logins, disable username/password logins, and disable both local and remote port forwarding, the line would look like this:
OPTIONS=”-w -s -j -k”
To read in the new options, just restart the Dropbear service.
sudo systemctl restart dropbear
(Note that we no longer need the “-R” option to automatically create the server keys, because we now have the “dropbear-keygen” service.)
To see the full list of runtime options, go back to the machine on which you compiled Dropbear, and view the man page.
man dropbear
Installing Dropbear on Raspberry Pi
There are only a few differences in the procedure when you install Dropbear on a Raspberry Pi. First, when you install the ARM version of CentOS 7, you’ll have to initially log into the root user account with the password, “centos”. You really don’t want for your devices to have the root account enabled, and you especially don’t want it enabled with the default password. So, the first thing that you want to do after logging into the root user account is to create your own normal user account, and add it to the “wheel” group. Then, assign it a password. For example, let’s add an account for user “donnie”.
useradd -G wheel donnie
passwd donnie
The sudo configuration is already set to allow full sudo privileges to members of the wheel group, so you won’t have to worry about configuring that.
Now, log out of the root user account, and log into the normal user account that you just created. Then, disable the root user account by entering:
sudo passwd -l root
After you’ve done that, you’re ready to install Dropbear. The preceding procedure works on Raspberry Pi, except that I did encounter a couple of slight glitches. When I installed the “Development Tools” group of packages, one package was missing, which caused a couple of other packages to not install, which in turn caused the entire operation to exit with an error. Those packages aren’t necessary for compiling Dropbear, so you can get around this problem by adding the “–skip-broken” option to the command for installing the “Development Tools” group. The command would then look like this:
sudo yum groupinstall “Development Tools” --skip-broken
The next glitch that I encountered came when I ran this command to compile the programs:
make PROGRAMS="dropbear dbclient dropbearkey dropbearconvert scp"
For some reason, the compile process ended with an error message before all of the programs were compiled. It’s not a big deal, because doing an “ls” command within the “dropbear-2018.76” directory will show you which of the program executable files are there. All you need to do is to run the “make PROGRAMS” command again for each executable file that’s missing. For example:
make PROGRAMS=”dropbear”
Once you’ve gotten all of the programs to compile, the “sudo make install” command will work as it should.
SELinux Considerations
SELinux is a type of mandatory access control that’s included by default in all Red Hat-type Linux distros. It provides enhanced security by helping to isolate processes from each other, and by preventing processes from accessing files and directories that they shouldn’t access. Dropbear works perfectly with SELinux, and no SELinux adjustments are necessary.
The x86/x86_64 versions of CentOS 7 come with SELinux in “enforcing” mode by default. For some strange reason, the ARM version of CentOS 7 comes with SELinux in “permissive” mode. This means that if SELinux detects what it would consider a security violation, it will allow the action to happen and then just log it. That’s handy for when you’re testing a device, but you don’t want for it to remain that way after you place the device into production. To place SELinux into “enforcing” mode, edit the “/etc/sysconfig/selinux” file. Look for the following line:
SELINUX=permissive
Change it to:
SELINUX=enforcing
SELinux is now set to go into enforcing mode whenever you boot up the device. For now though, it’s still in “permissive” mode. To place SELinux into “enforcing” mode without rebooting the device, run this command:
sudo setenforce 1
Summary
For this demonstration, we used two CentOS 7 virtual machines. If you install Dropbear on another Linux distro, the main difference in the procedure will be in the selection of development tools that you’ll install on the compiler machine, and the commands that you’ll use to update the system. Also, some Linux distros have configuration files in different places, so you would need to modify the “dropbear.service” file to reflect that.
We saw that when installing the x86/x86_64 version of CentOS 7, we can create a normal user account with administrator privileges, and keep the root user account disabled. We also saw that when you install the ARM version of CentOS 7, you’ll be required to log into the root user account with “centos” as the default password. Always be sure to disable the root user account, especially if it comes with a default password.
